Creative Paradise Glass has some really nice texture molds. I tend to have a love-hate relationship with them. The first one I ever tried was a disaster, times five! Others have been a wonderful success. Recently I did have another disaster with the koi in a pond mold (DT29), though I will give that one another go, with a modified schedule.
Today I am writing about DT30 Sq.-Butterfly – the large butterfly. On the CPI Facebook page you will see posts from several frustrated artists that have issues with this mold. I went into it knowing that there could be problems, but I was optimistic. It may well be that because I completely documented my entire process that I am thrilled to report I have had no real issues with this mold. You can find their tutorial on the CPI website, but for some reason they have it labeled as DT26 Butterfly Tutorial (instead of DT30).
So, here’s what I did.
Bullseye Glass colors used – Black Opal, Powder, Deep Red Opal, Fine, Aventurine Blue, Powder. I used a powder vibe to fill in the veins and used an earwax vacuum and a small paint brush to clean up bits that went astray. Both tools are highly recommended.

Black in the body, blue in the veins and deep red in the wing spots.
Next. home made medium/fine clear irid frit was added on top of the black body.
Red (1122), Fine was used around the wing edges. Luna was keeping an eye on me to be sure I put the lid back on the frit when I was done with it. 😉

Then for the wings – Tangerine Orange Opal, Fine was used on the outer edges and Marigold Yellow Opal, Fine was used in the center. In the CPI tutorial, an other photos of this butterfly, you see people just cutting the butterfly in thirds with the colors. I choose to follow the outlines of the butterfly. In my opinion, this looks better, since it doesn’t give the impression you were in a hurry and just threw on thee colors.

Next, the leaves. Aventurine Green, Powder was used in the veins of the leaves. Just lightly sprinkle it on, then use your fingertip to lightly brush it off the top of the leaves and into the crevices. Then clean up with a small paintbrush to further move the powder where it belongs. The leaves themselves then were sprinkled with Kelly Green, Fine and then over the top of everything went Emerald Green, Fine. Again, use the ear wax vacuum to remove frit that is not where it belongs.
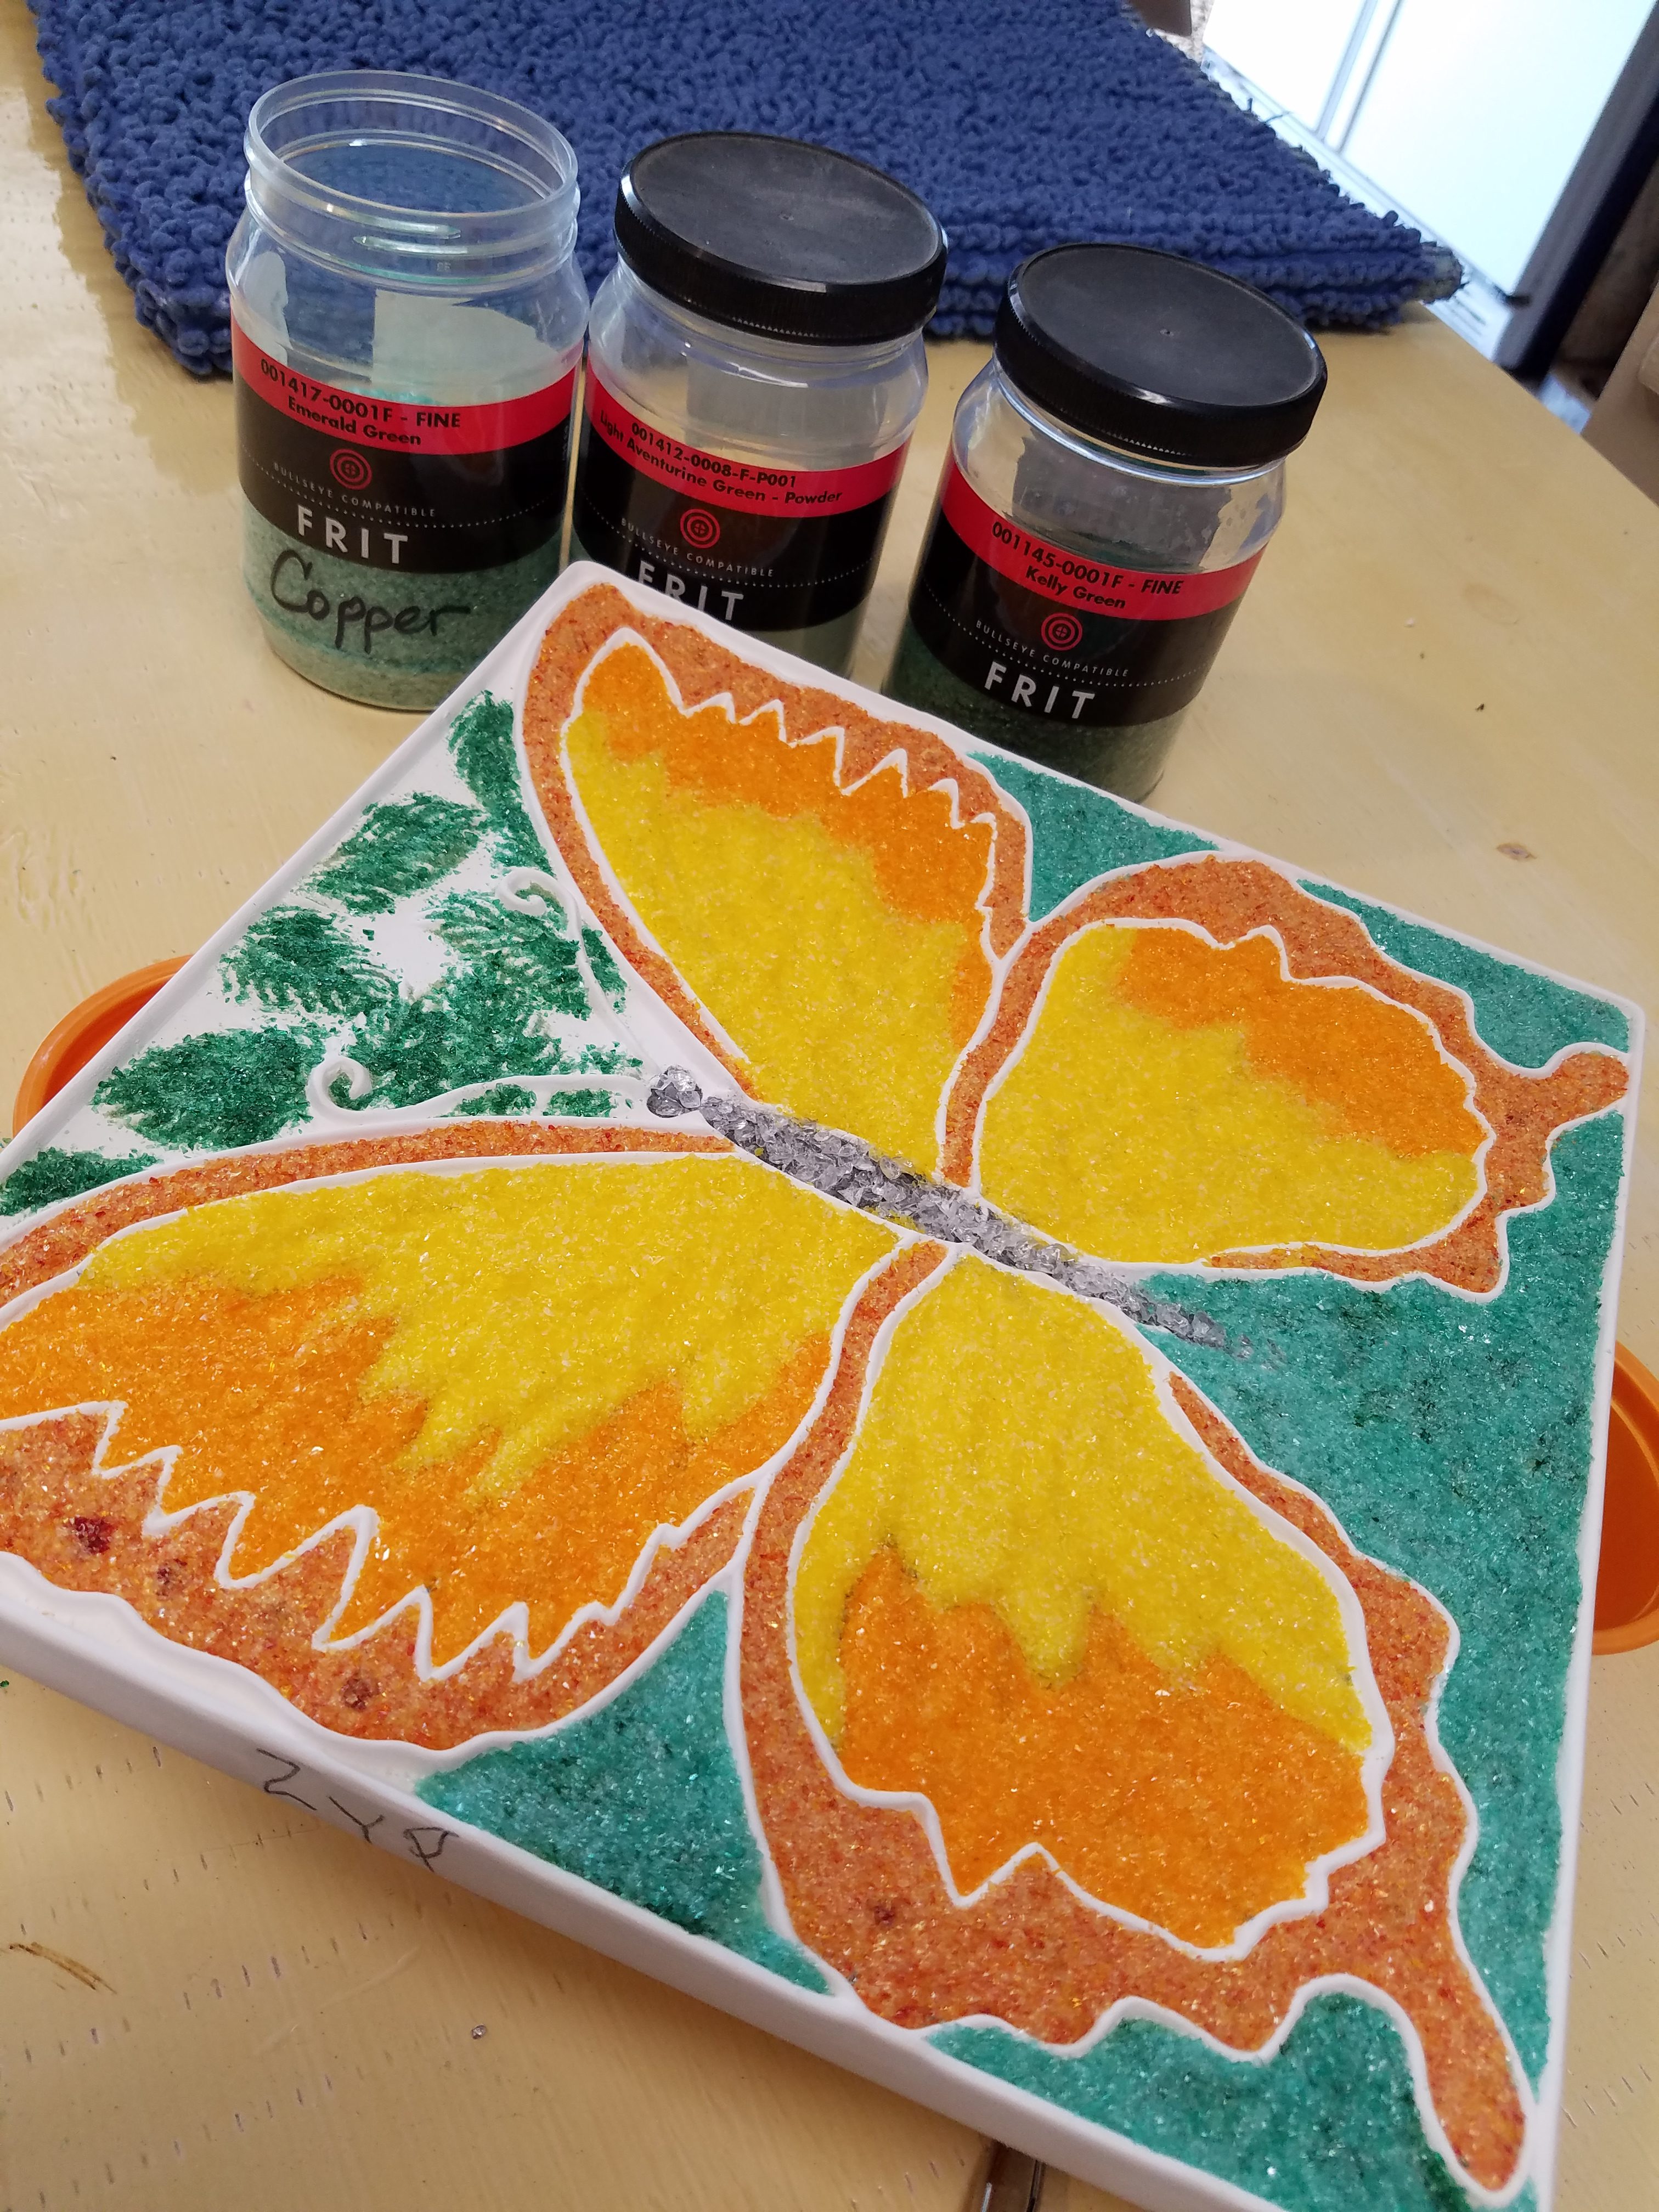
When complete with the frit, the entire thing was capped with one 3mm piece of Tekta, which was cut to 10″x10″.
Then, into the kiln it goes. The mold is placed on a couple of kiln posts so that it will have plenty of air circulation around it. Only the top and bottom edge are on about 1/4″ of the 6″-long post.

The firing schedule I used had to be modified from the tutorial, since all of CPI tutorials are for system 96 glass.
1 – 275 degrees per hour to 1215 and hold for 45 minutes
2 – 50 degrees per hour to 1250 and hold for 30 minutes
3 – 300 degrees per hour to 1425 and hold for 10 minutes
4 – as fast as possible (9999) to 900 and hold for 90 minutes
5 – 100 degrees per hour to 700 with no hold – off or end of program.
Let the kiln cool naturally. I let mine cool until its about 200 degrees, then I prop the lid about two inches. I will then open the lid and let it further cool once it reaches about 125 degrees. From I then leave everything on the shelf until it’s ambient temperature. Today, that was 89 degrees. Since the kiln shelf holds heat, as does the glass, I really don’t want to take it out and put it on a cold surface. If the glass is warm when I take it out of the kiln I will cool it on a towel for a few hours.
This photo shows how the top sheet of glass shrunk to give a natural edge to the glass. I think next time I will fill in those red wing areas where it really pulled in with more frit. I am not bothered the way it is now, but I’d like to see if it won’t pull in quite so much with extra frit in those areas.
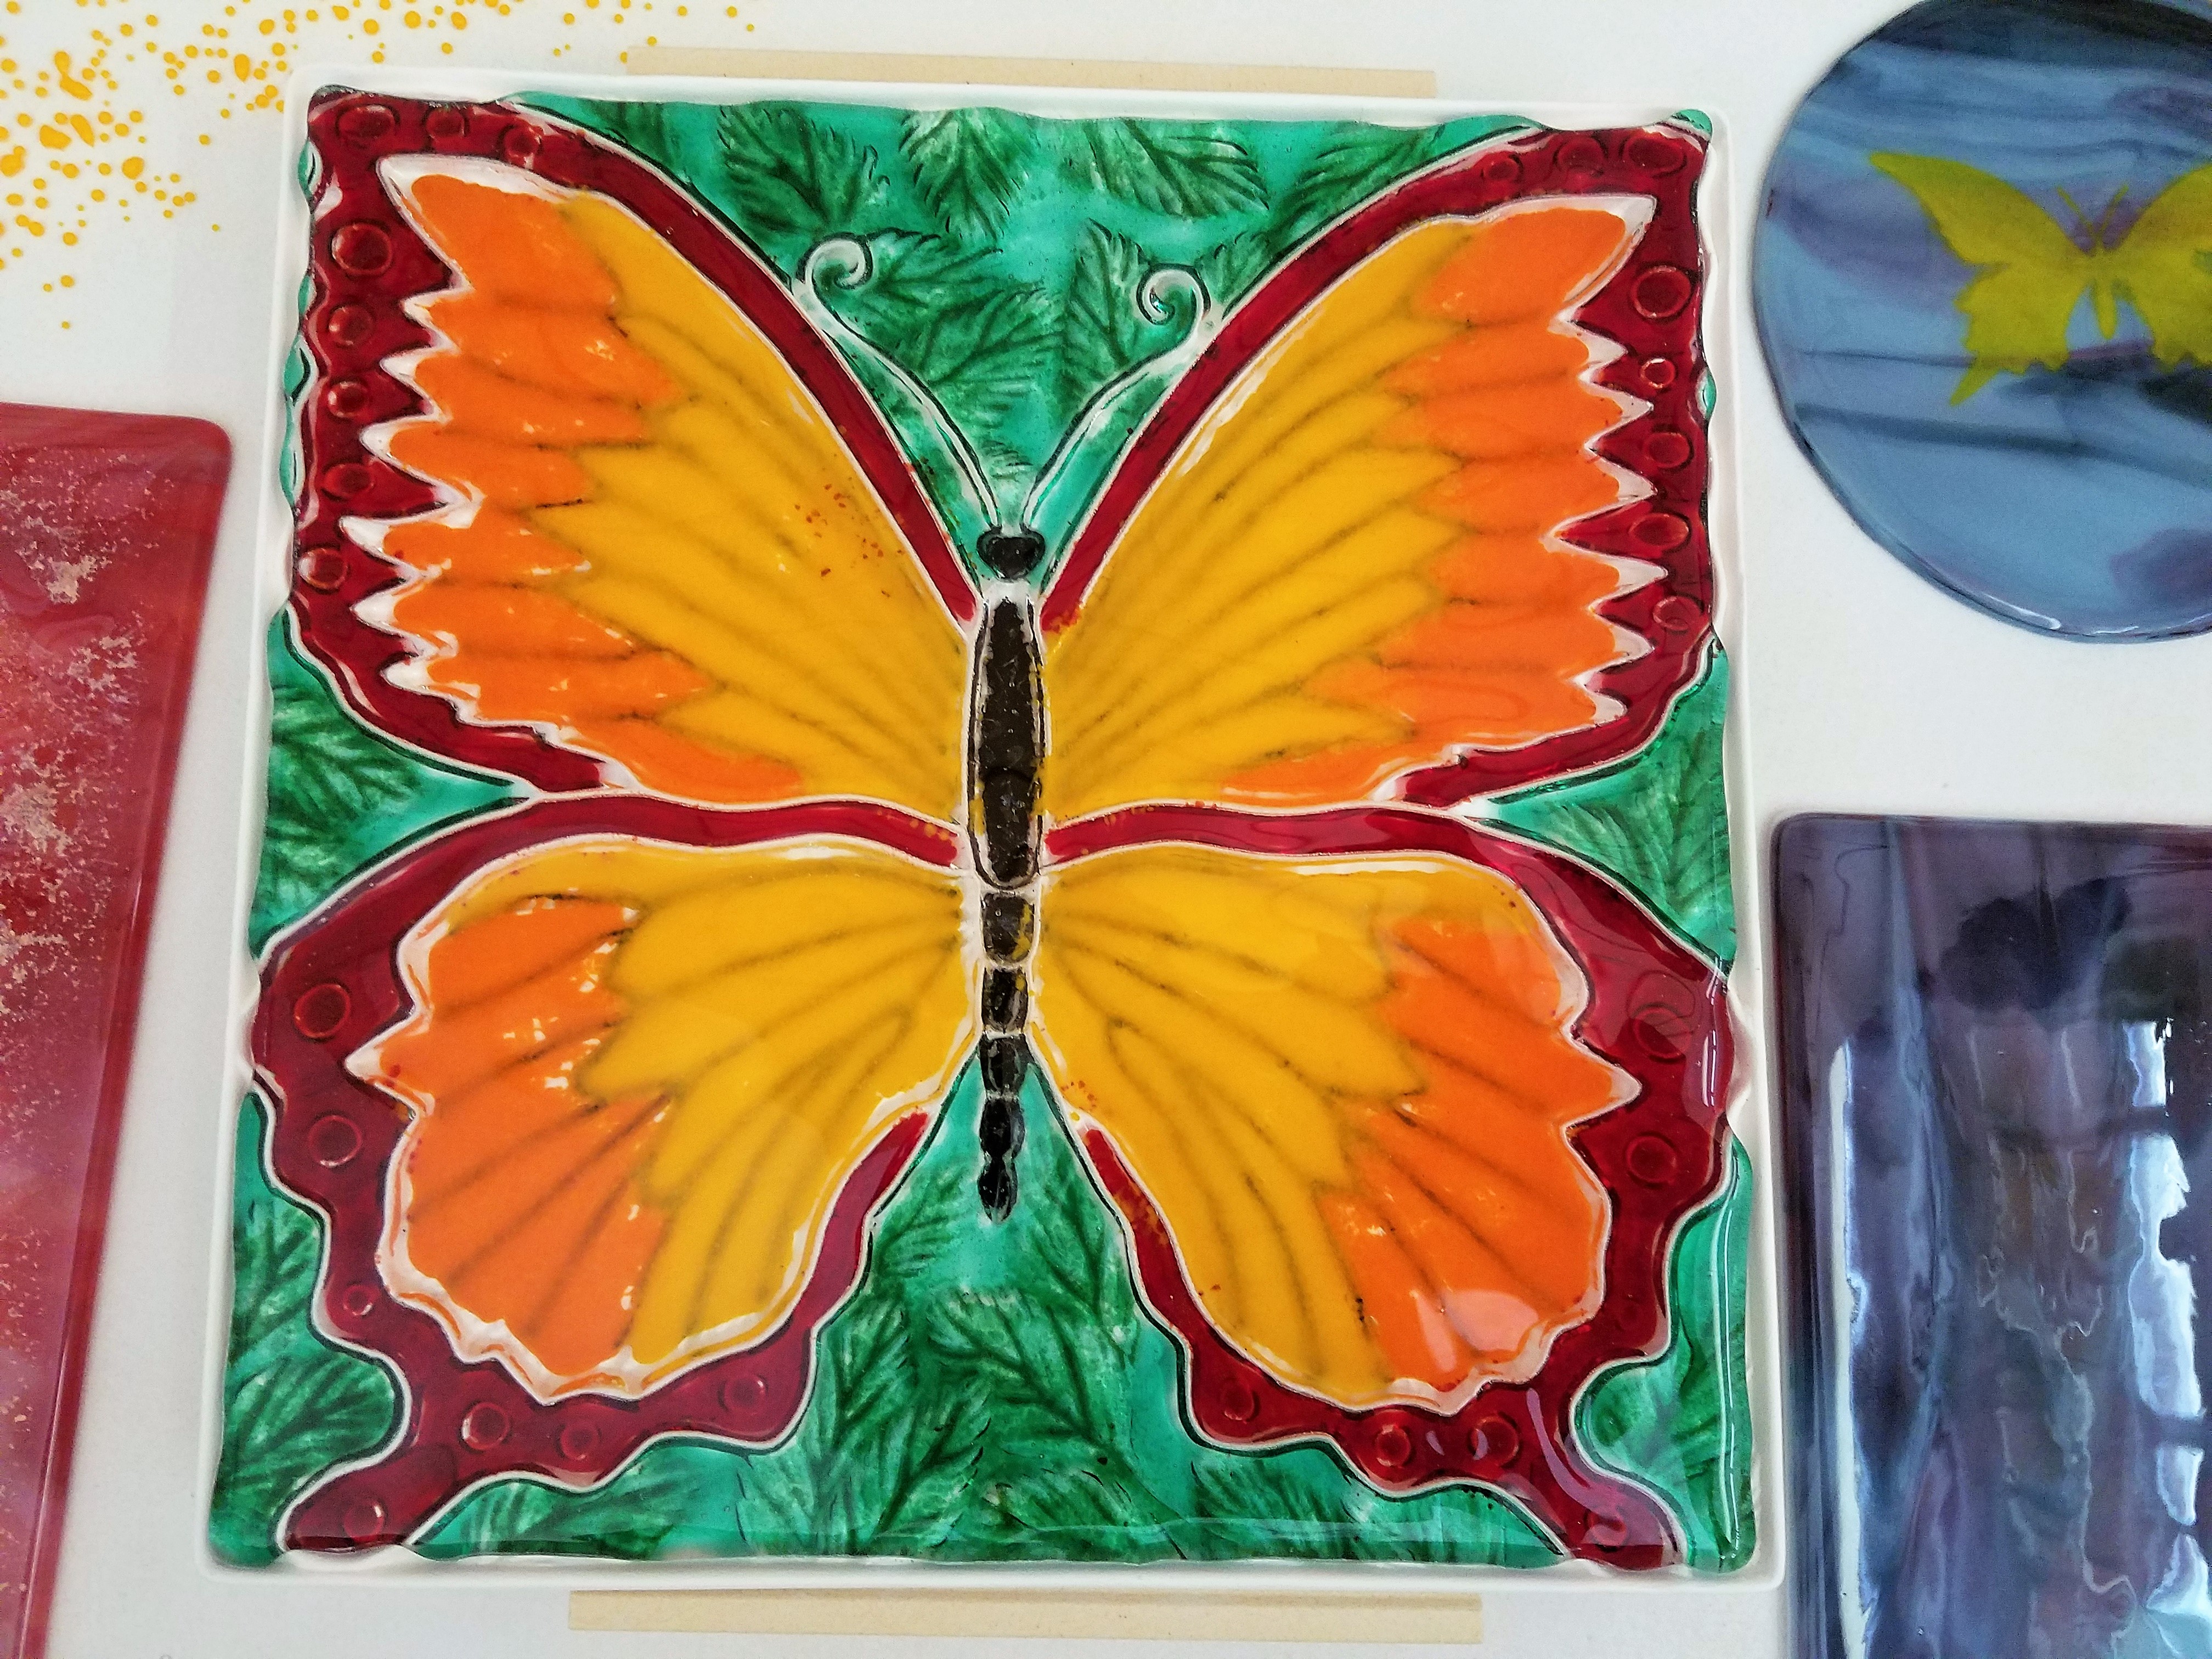
The piece was then carefully removed from the mold. I used pot holders to flip it and set the glass on the shelf to further cool.
At this point, it is still in the kiln and needs to be cleaned up (ZYP reside removed). I did a bit of rubbing of the white powder and it came off easily, so I don’t think I will have any trouble. I am contemplating adding some gold to the circles on the wings and wondering what to do with the antennae. But, those will have to wait until tomorrow.
