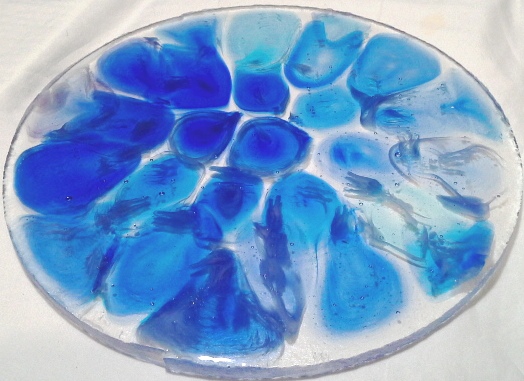
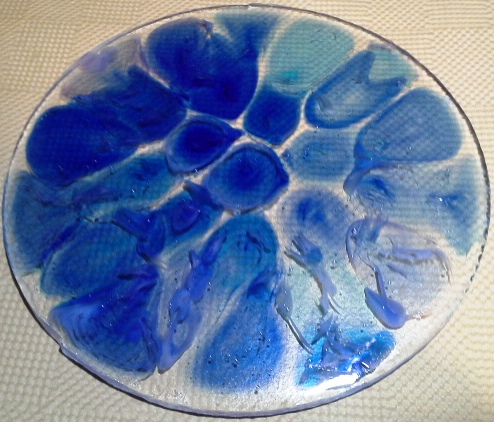
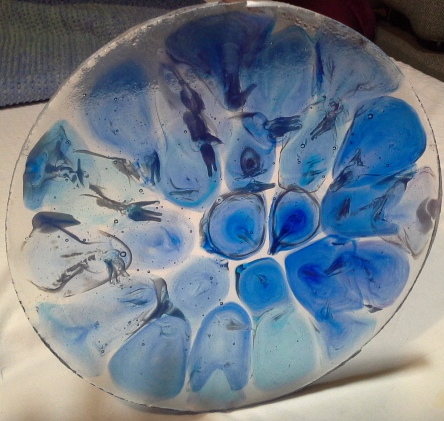
New Jewelry Option Found

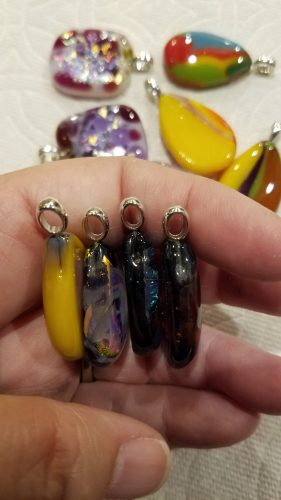
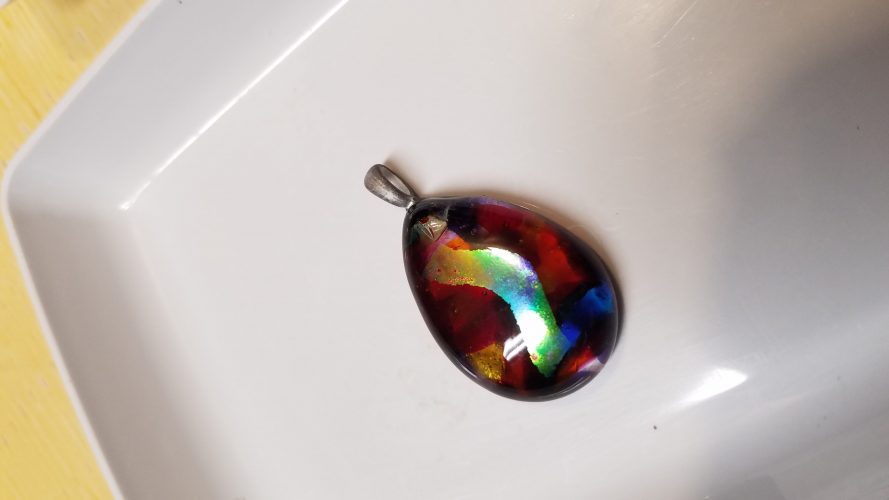
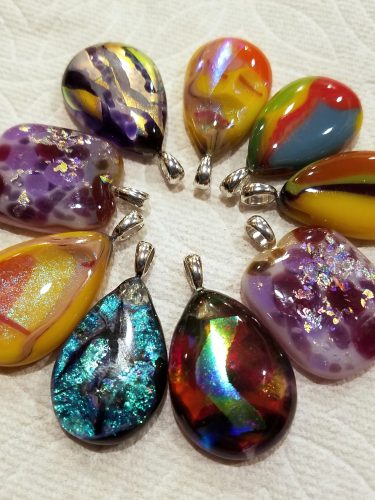
I tried a new product from Rio Grande called imbedables (new to me) and really like it, so thought I would share. These are fusible bails! This was a test, so they are not perfect, but now I know what to do differently the next time around.


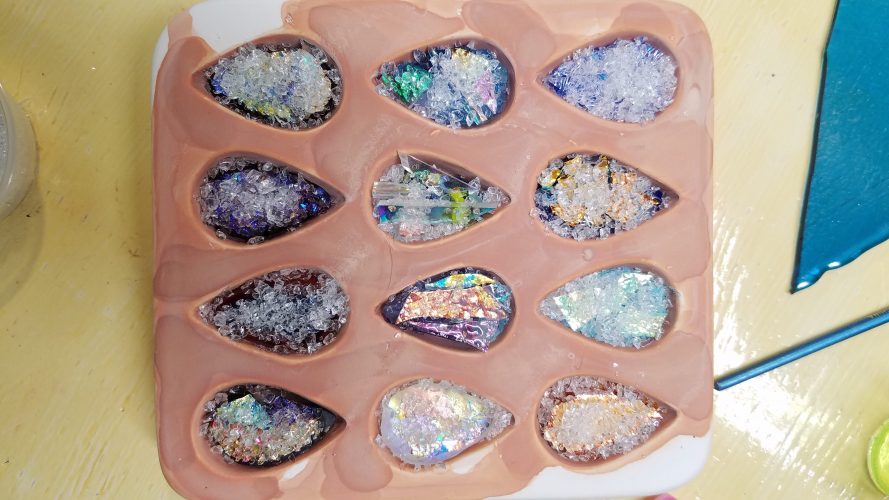
1 – I made cabochons in a mold, making them a bit on the thick side. (Some of them I used some old “pebbles” in the mold and added dichro). After taking out of the mold, I cleaned them up by grinding as needed and cleaning really well.


2 – using my ring saw I sliced into the tip of the glass, just deep enough for the full length of the bail. The square pieces I drilled with a dremel, but didn’t like the effort it took and the outcome – maybe a drill press would make it easier.


3 – Insert the bail using a dab of glue taking care to center and straighten the bail. Don’t do as I did and forget these are SILVER – which requires a dedicated shelf (oops).


4 – Fuse to close up the slice (or drilled hole) and fire polish. Next time I will go a few degrees hotter and hold a couple minutes longer as these didn’t quite fully close (close enough for a test). Maybe even add a few bits of frit on the sides of the cut.


5 – They will come out ugly, looking like a galvanized nail, but that is easily dealt with by 24 hours in a rock tumbler.

Large Butterfly

Creative Paradise Glass has some really nice texture molds. I tend to have a love-hate relationship with them. The first one I ever tried was a disaster, times five! Others have been a wonderful success. Recently I did have another disaster with the koi in a pond mold (DT29), though I will give that one another go, with a modified schedule.

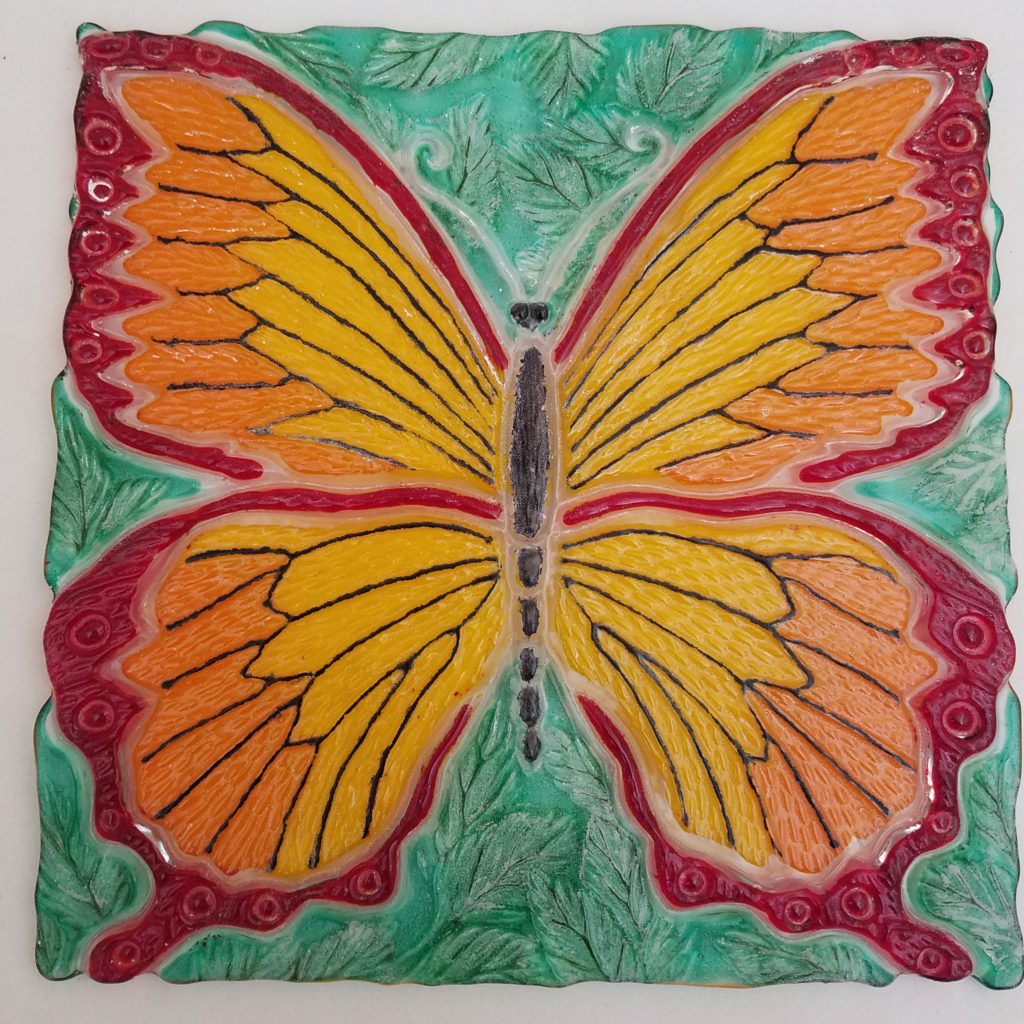
Today I am writing about DT30 Sq.-Butterfly – the large butterfly. On the CPI Facebook page you will see posts from several frustrated artists that have issues with this mold. I went into it knowing that there could be problems, but I was optimistic. It may well be that because I completely documented my entire process that I am thrilled to report I have had no real issues with this mold. You can find their tutorial on the CPI website, but for some reason they have it labeled as DT26 Butterfly Tutorial (instead of DT30).

So, here’s what I did.

Bullseye Glass colors used – Black Opal, Powder, Deep Red Opal, Fine, Aventurine Blue, Powder. I used a powder vibe to fill in the veins and used an earwax vacuum and a small paint brush to clean up bits that went astray. Both tools are highly recommended.
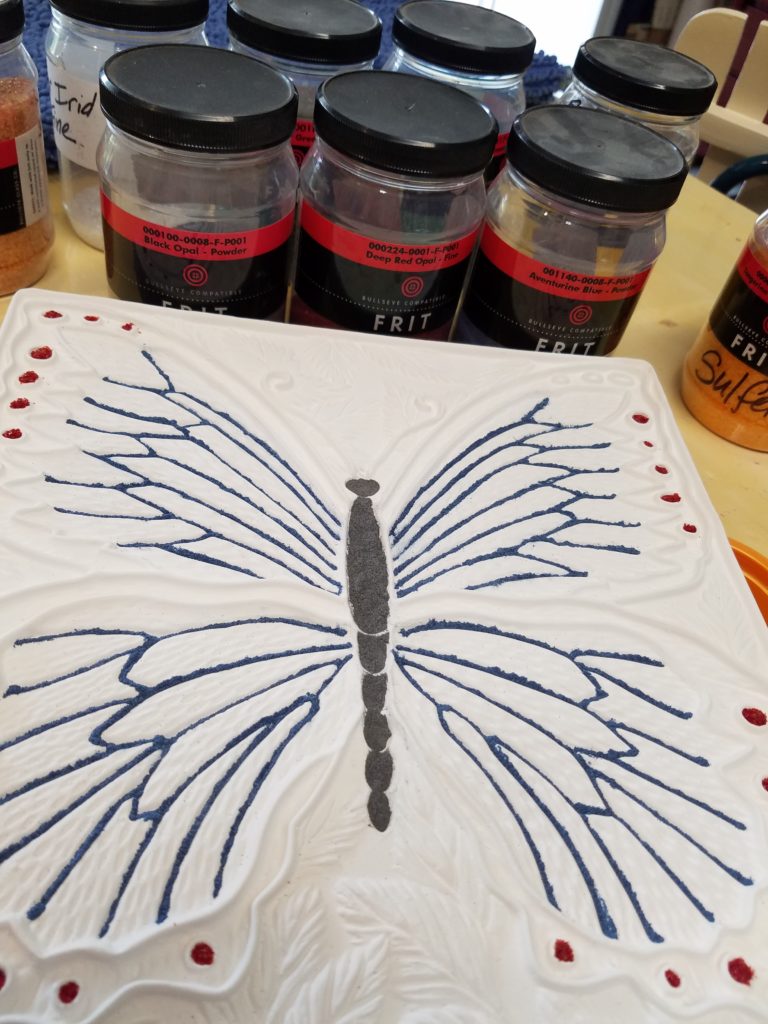
Black in the body, blue in the veins and deep red in the wing spots.

Next. home made medium/fine clear irid frit was added on top of the black body.

Red (1122), Fine was used around the wing edges. Luna was keeping an eye on me to be sure I put the lid back on the frit when I was done with it. 😉
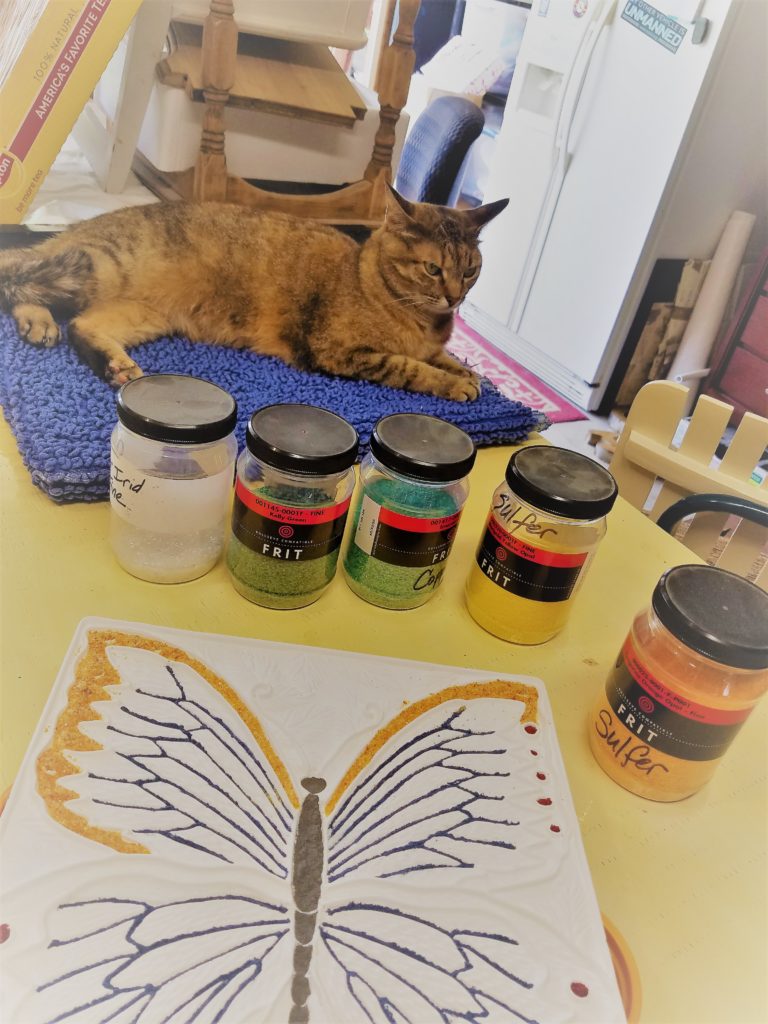
Then for the wings – Tangerine Orange Opal, Fine was used on the outer edges and Marigold Yellow Opal, Fine was used in the center. In the CPI tutorial, an other photos of this butterfly, you see people just cutting the butterfly in thirds with the colors. I choose to follow the outlines of the butterfly. In my opinion, this looks better, since it doesn’t give the impression you were in a hurry and just threw on thee colors.
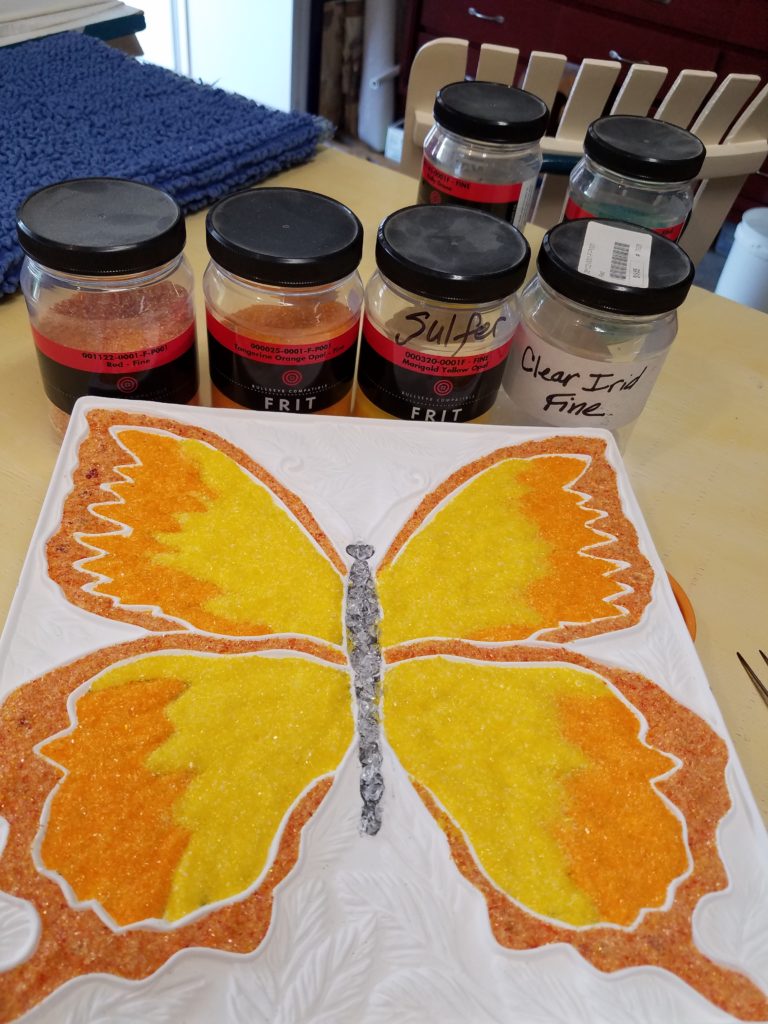
Next, the leaves. Aventurine Green, Powder was used in the veins of the leaves. Just lightly sprinkle it on, then use your fingertip to lightly brush it off the top of the leaves and into the crevices. Then clean up with a small paintbrush to further move the powder where it belongs. The leaves themselves then were sprinkled with Kelly Green, Fine and then over the top of everything went Emerald Green, Fine. Again, use the ear wax vacuum to remove frit that is not where it belongs.
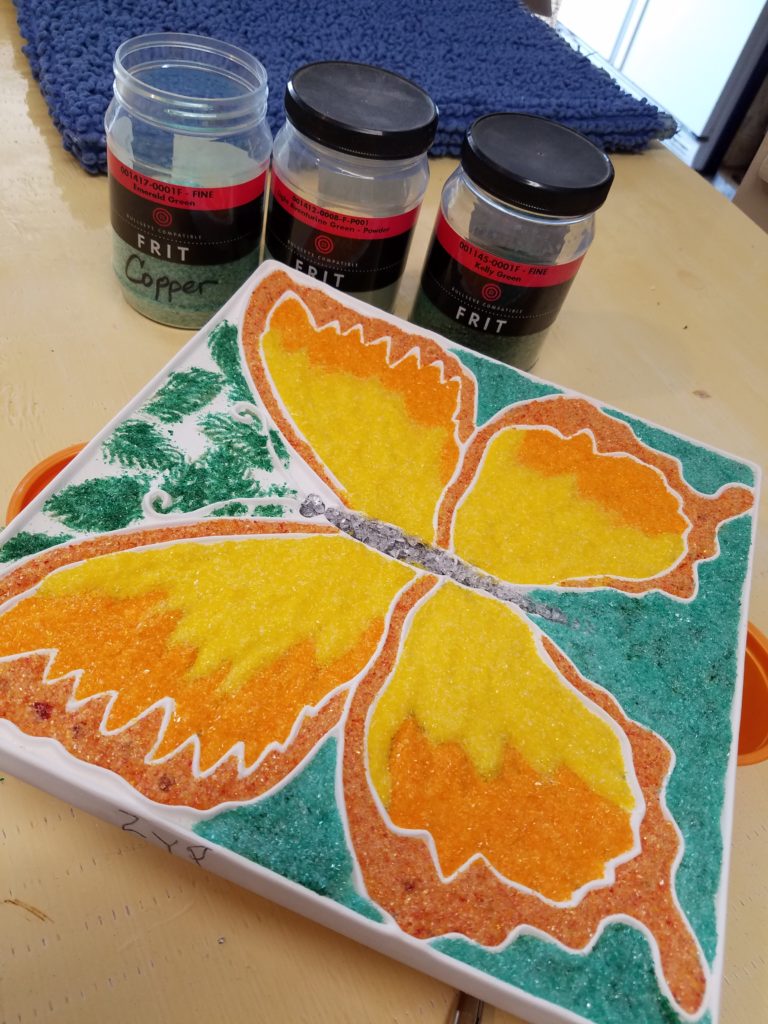
When complete with the frit, the entire thing was capped with one 3mm piece of Tekta, which was cut to 10″x10″.

Then, into the kiln it goes. The mold is placed on a couple of kiln posts so that it will have plenty of air circulation around it. Only the top and bottom edge are on about 1/4″ of the 6″-long post.

The firing schedule I used had to be modified from the tutorial, since all of CPI tutorials are for system 96 glass.

1 – 275 degrees per hour to 1215 and hold for 45 minutes

2 – 50 degrees per hour to 1250 and hold for 30 minutes

3 – 300 degrees per hour to 1425 and hold for 10 minutes

4 – as fast as possible (9999) to 900 and hold for 90 minutes

5 – 100 degrees per hour to 700 with no hold – off or end of program.


Let the kiln cool naturally. I let mine cool until its about 200 degrees, then I prop the lid about two inches. I will then open the lid and let it further cool once it reaches about 125 degrees. From I then leave everything on the shelf until it’s ambient temperature. Today, that was 89 degrees. Since the kiln shelf holds heat, as does the glass, I really don’t want to take it out and put it on a cold surface. If the glass is warm when I take it out of the kiln I will cool it on a towel for a few hours.

This photo shows how the top sheet of glass shrunk to give a natural edge to the glass. I think next time I will fill in those red wing areas where it really pulled in with more frit. I am not bothered the way it is now, but I’d like to see if it won’t pull in quite so much with extra frit in those areas.
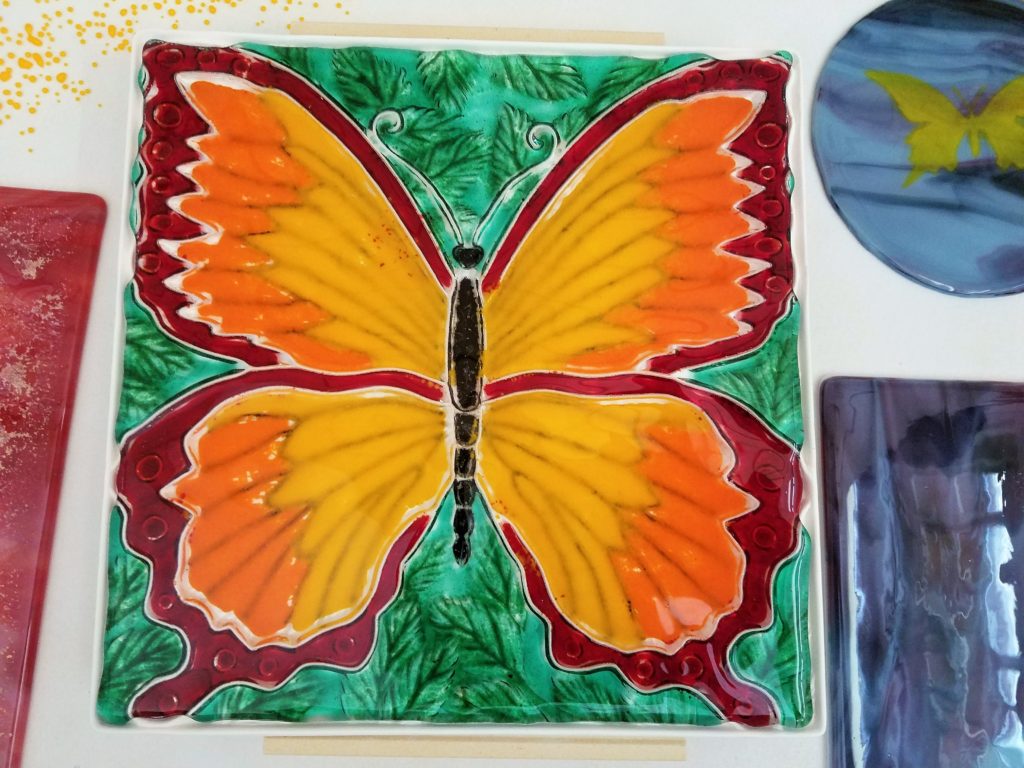
The piece was then carefully removed from the mold. I used pot holders to flip it and set the glass on the shelf to further cool.

At this point, it is still in the kiln and needs to be cleaned up (ZYP reside removed). I did a bit of rubbing of the white powder and it came off easily, so I don’t think I will have any trouble. I am contemplating adding some gold to the circles on the wings and wondering what to do with the antennae. But, those will have to wait until tomorrow.
Rainpebbles Glass focus in 2015

After 4 years of operation, we are changing the focus of Rainpebbles Glass in 2015.
In the future, we will be focussing on art and display objects, and moving away from purely functional pieces. The reasons for this are mainly that Mary finds the creation of art and display objects to be more challenging, now that she has expanded her skills.
We will be holding a Sale of existing functional fused glass objects on Etsy over the next 3 months. Watch the Etsy Site for news of that sale.
New pieces will still appear on the Etsy site as they are created, if they are not sold at creation. Currently, some of our pieces are not even making it to Etsy, since they are being sold almost out of the kiln.

Working on new things.

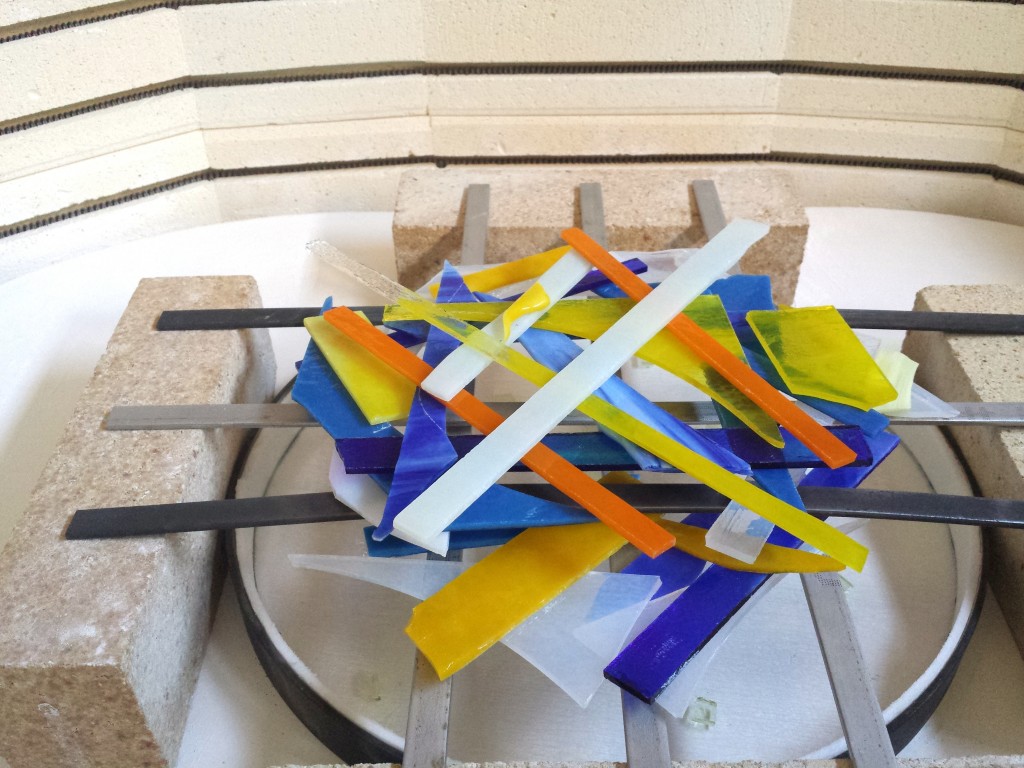
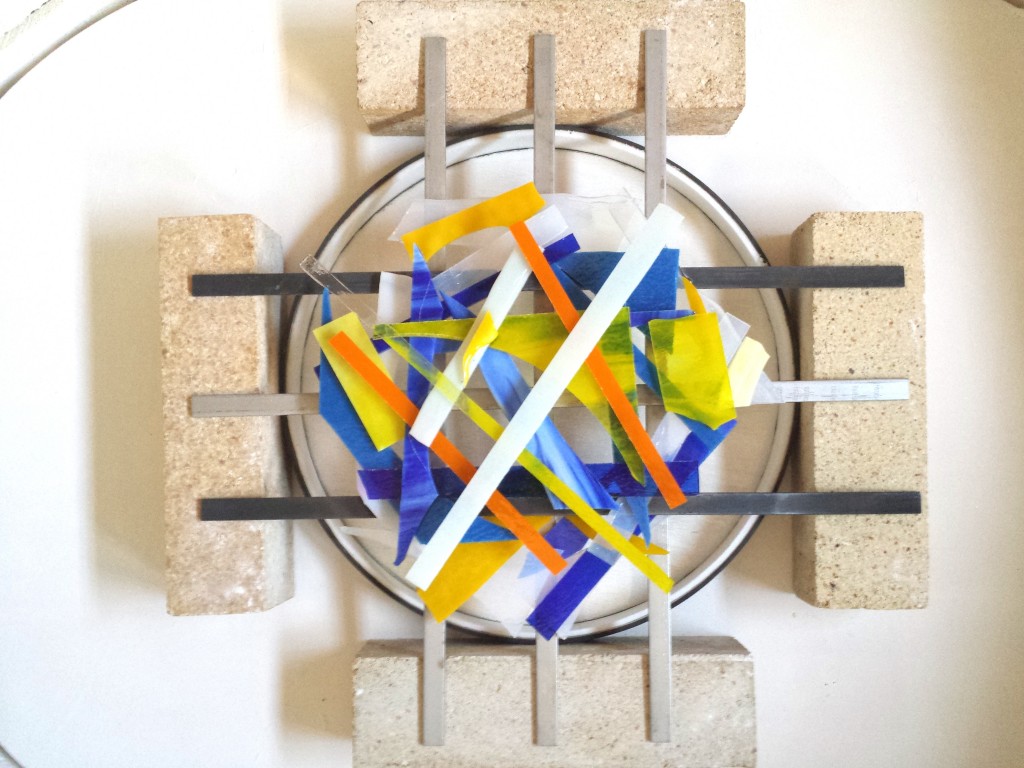
Not sure what to call this – when it’s in a pot, it’s a pot melt. This is on sticks, so lets go with stick melt.
2014-12-16 15.08.42
We’ve got white, blue, yellow and orange. We all know yellow and blue make green; I wonder how much mixing will happen here and how much green we’ll get. Tomorrow will tell. It may come out as a brown mess, but keep your fingers crossed we get something pretty.
2014-12-16 15.08.35

2015 Glass Classes

We will be continuing our Glass Classes into the Winter and Spring of 2015. Anybody who wishes to attend Glass Class should email us or contact Mary via the website.
Classes are $60 for a 3 hour session (which sometimes extends to longer if people need to complete their initial design), plus the cost of any special glass.

Why does something seemingly so easy, take so very long? ** UPDATE – SOLD! **

Oh – right… It’s because there is no fast way to design with millions and millions of pieces of crushed glass. Each one took about 4 hours, though that did include a bit of cleaning before & after – and a break for some pizza.

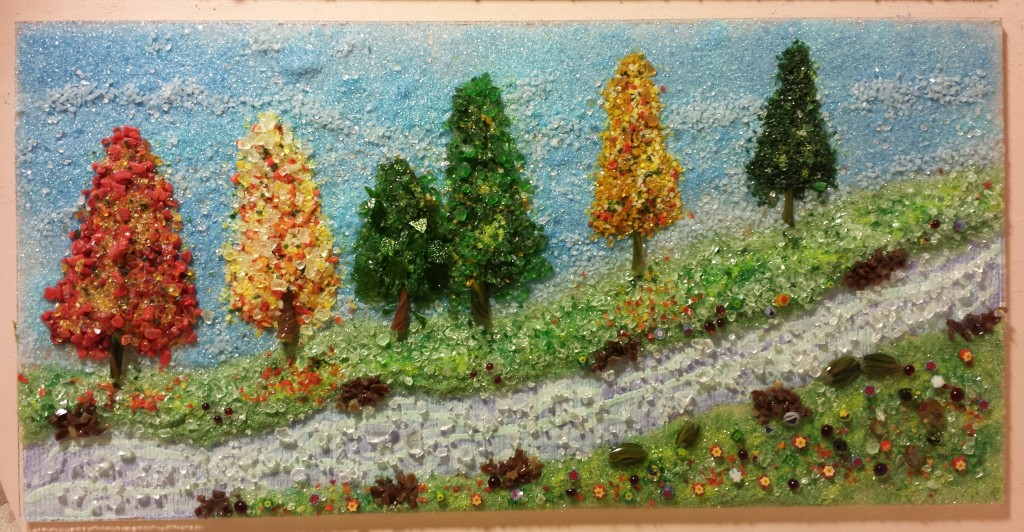
Trees at the River is a first – I am bravely using Unique Glass Colors. I’ve used them in a class and watched several online videos, but this is the first full size piece. Fingers crossed.

2014-12-14 20.28.48
Trees at the River #11142

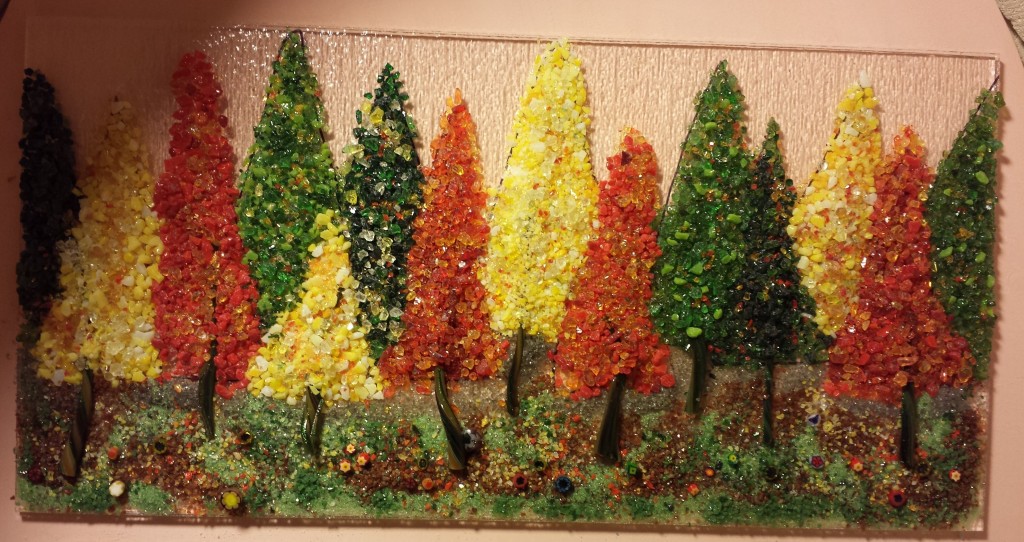
People just love my Trees. And, I just love making them. I just can’t seem to ever get two the same – but I think that is a good thing. Same theme, same glass, but no two will ever be the same. That’s a good thing.

2014-12-14 20.12.09
Trees #11141

Unless Santa brings me a vitrigraph kiln, or I get one for my birthday, my funky tree trunks will come to an end. I have stretched my selection of tree trunks about as far as I can. I still have lots of vitrigraph, but none suitable for trees. I guess that means I need to get more funky and use the vitrigraph that I already have for something else. =D

UPDATE – Both of these pieces are already SOLD! But it is not too late to order new Fall Trees pieces from us!

Mary’s Pot Melt Tutorial

With many thanks to Laurie Spray (http://bonnydoonfusedglasstools.com/) I have learned something new. I hope my experience can help someone else struggling to get started. The results on my first attempt are just acceptable, not great. But, now I know what I need to change the next time, which will be when I get around to pulling out the saw to cut strips from my broken kiln shelf.

Summary:

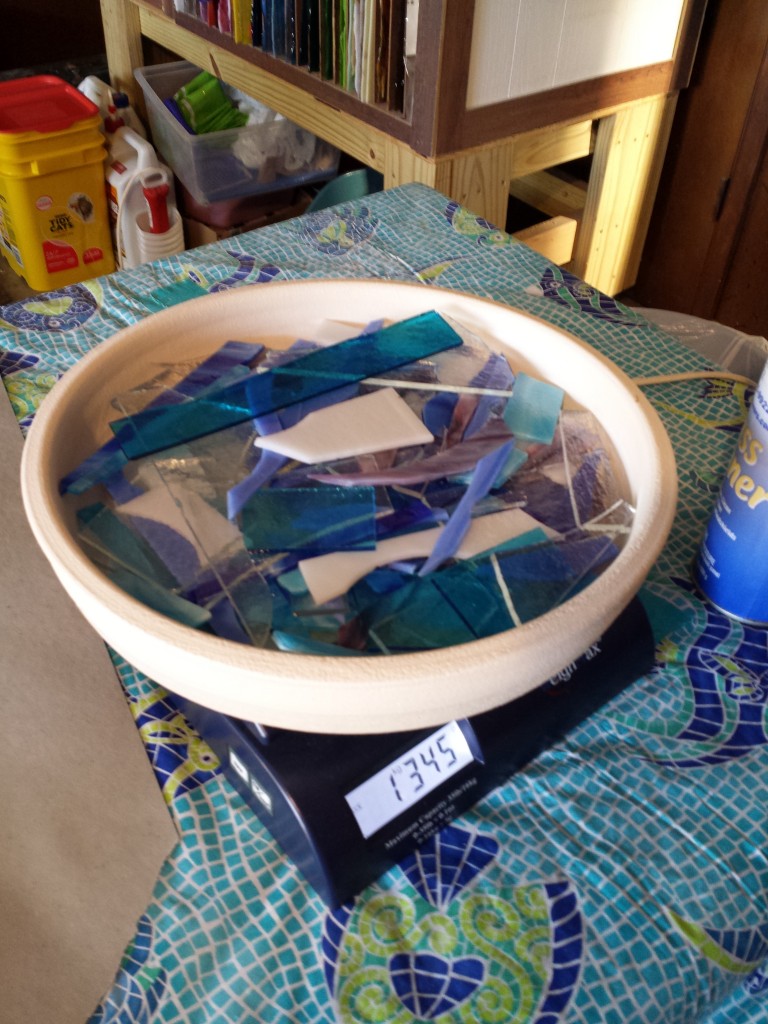
  • In my opinion, it’s just a tad too thick. The total weight used was 1345 grams of glass. I should have weighed the crucible first to know how much glass is left, but, there really isn’t all that much.
  • Next time I will try butting the edges of the thin fire (and backing the seam with a shot of MR97 just in case. Where the seam was, there is a significant dent that will need cold working, but that’s ok because the entire edge needs just a bit anyway.
  • The colors are too light. Next time I will omit the 580g of clear in favor of more color when transparents are used, and half the amount if all opalescent is used.

Material used:

Thin fire paper (cut ¼” larger than mold)

12” stainless steel ring mold

10” bubble pot melt crucible

2 stainless steel strips (used here)

2 strips of cut up kiln shelf (will use next time in place of ss strips)

4 kiln stilts

1” wide 1/8” thick fiber paper

Cut a piece of clear to fit snugly in the mold.
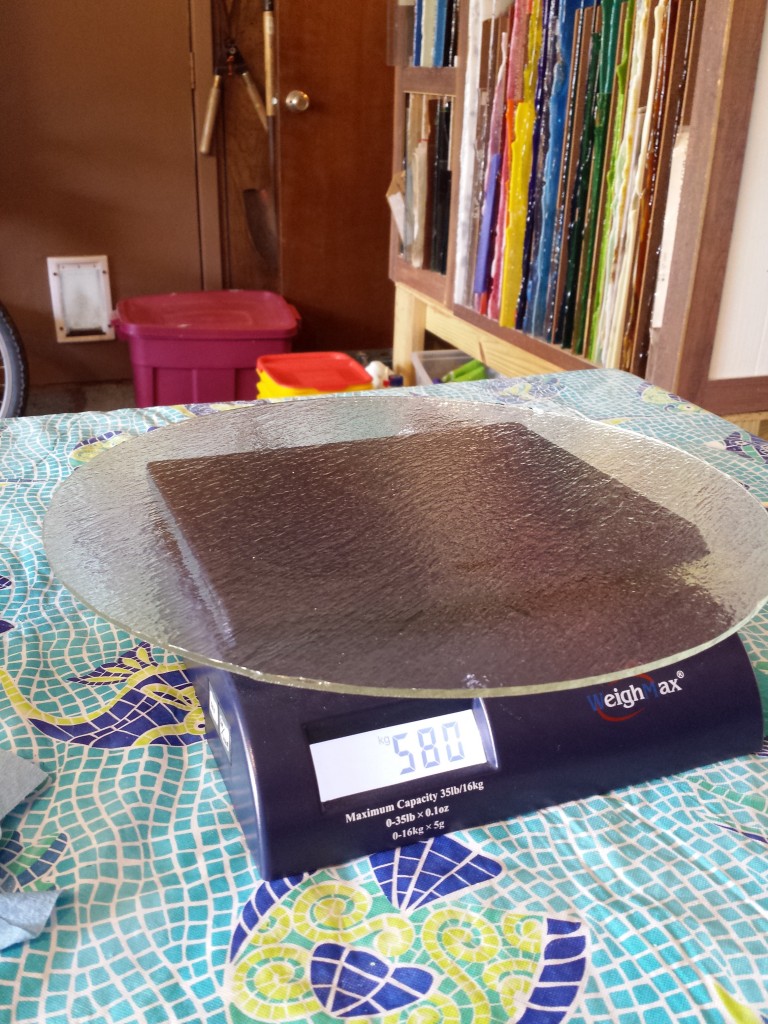
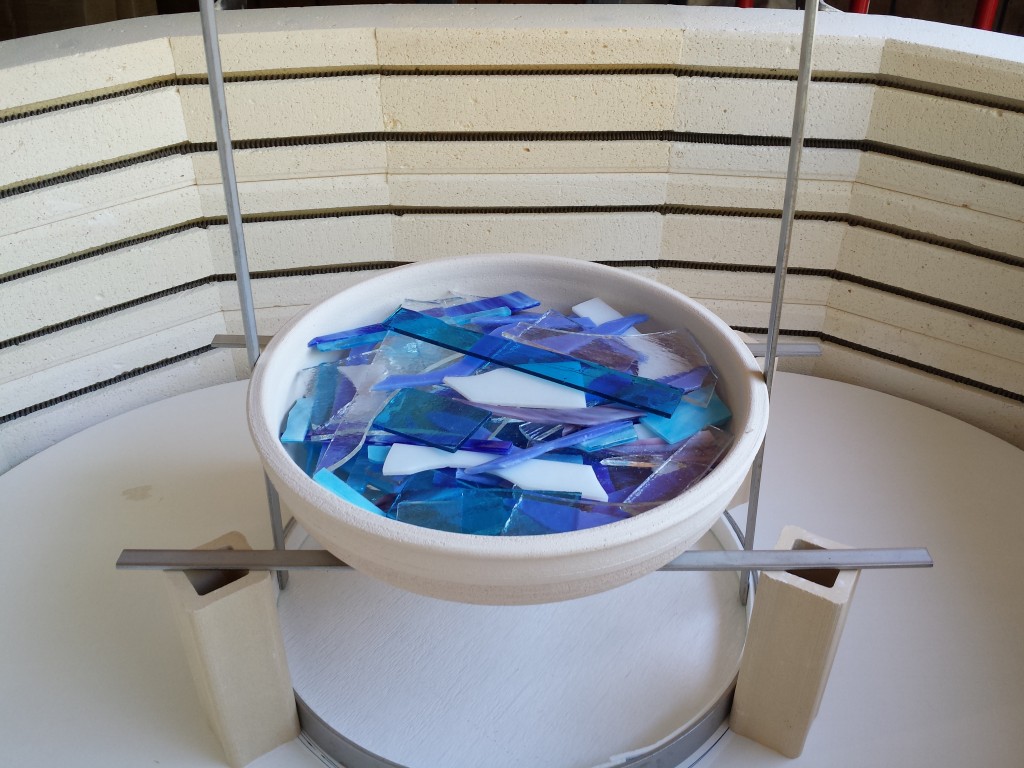
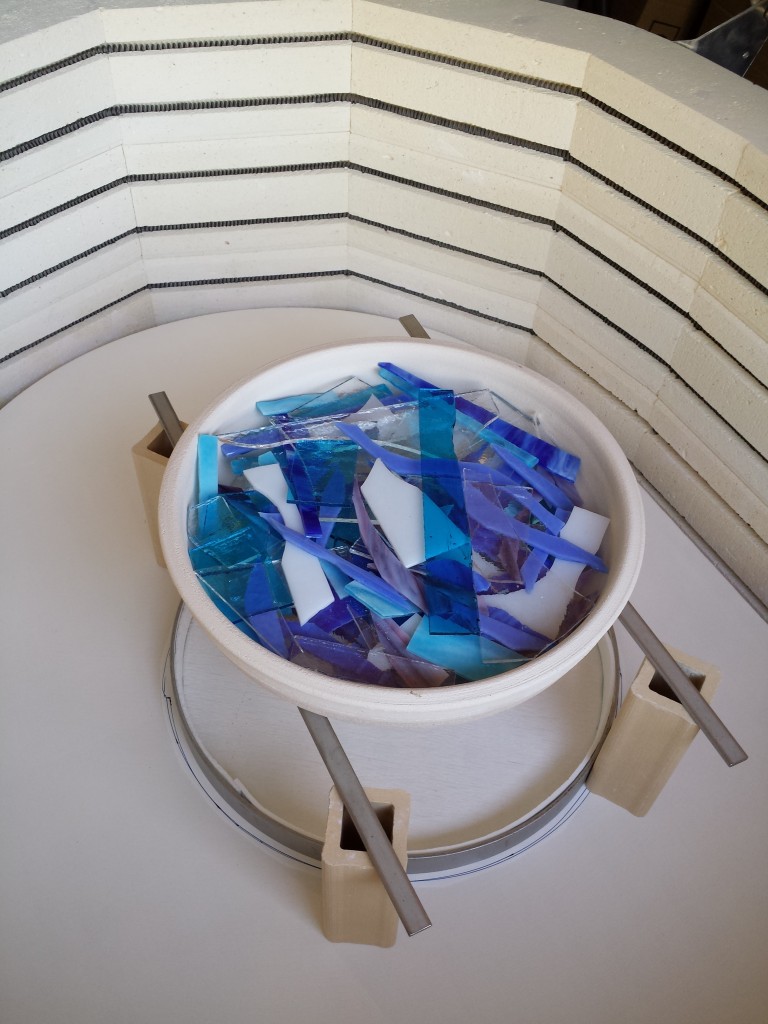
Start by cutting the fiber paper to fit the mold with a slight overlap at the seam(s) Place the mold in the kiln on top of the thin fire Add a disk of clear glass cut to fit. Here it was 12” (perfectly fit inside the mold) to start, but I had to grind it down about 1/8 inch to fit the ring with the fiber paper added. Weight of glass 580g.
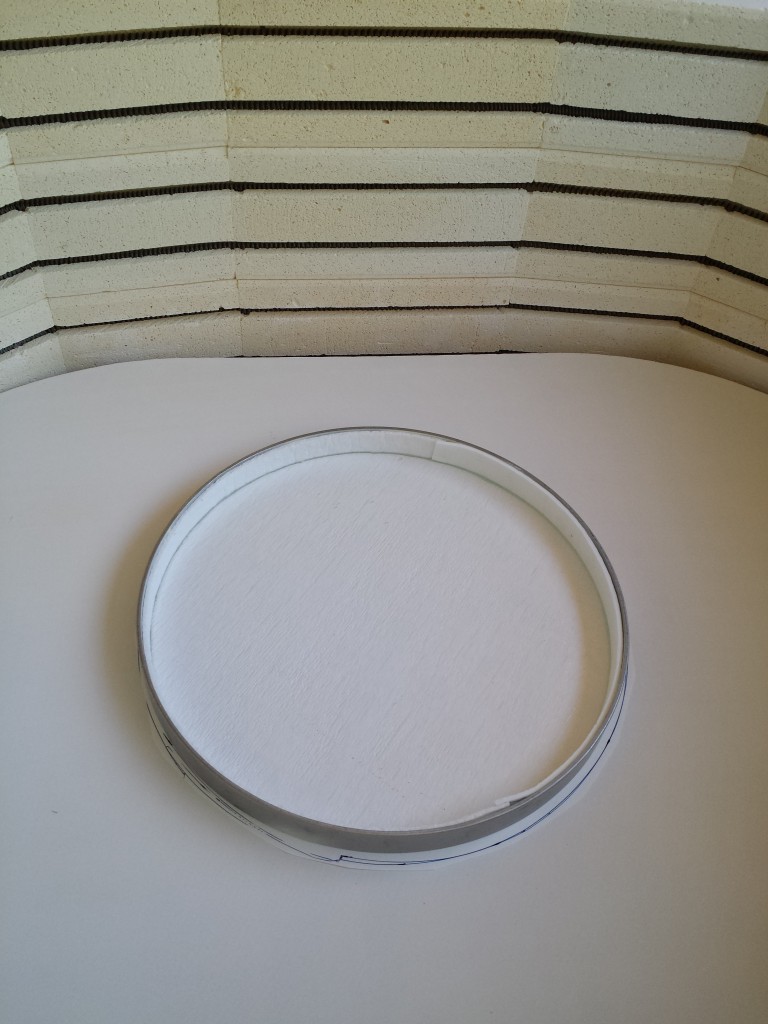
Start by cutting the fiber paper to fit the mold with a slight overlap at the seam(s)
Place the mold in the kiln on top of the thin fire.
Add a disk of clear glass cut to fit. Here it was 12” (perfectly fit inside the mold) to start, but I had to grind it down about 1/8 inch to fit the ring with the fiber paper added.
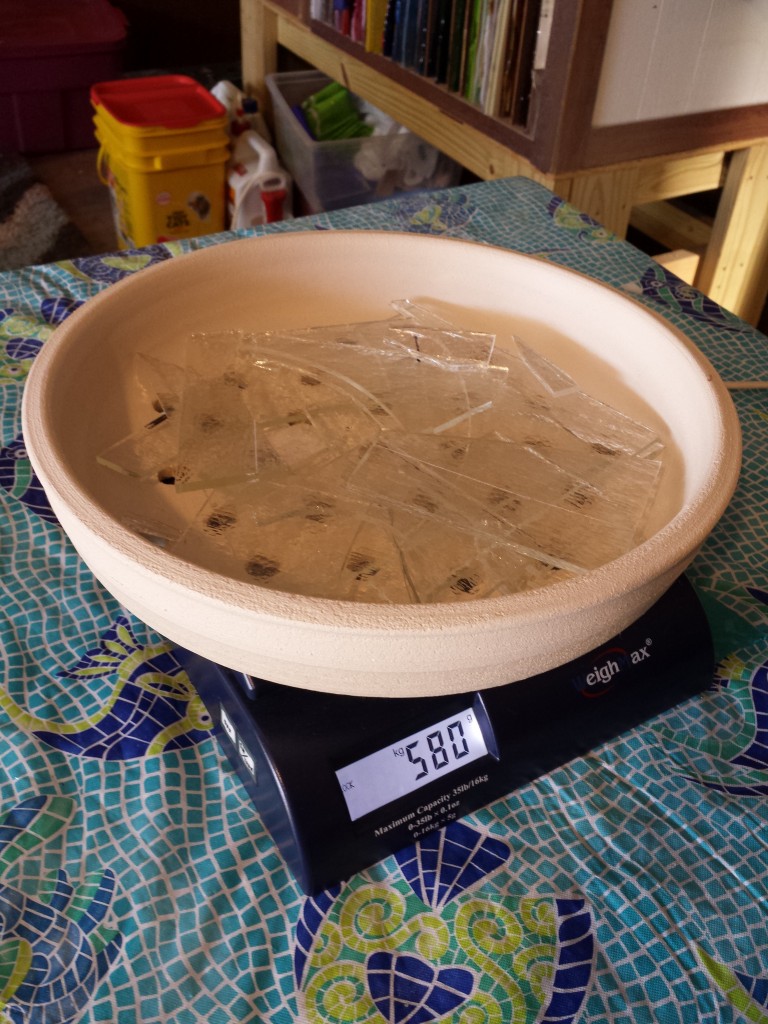
Weight of glass 580g.
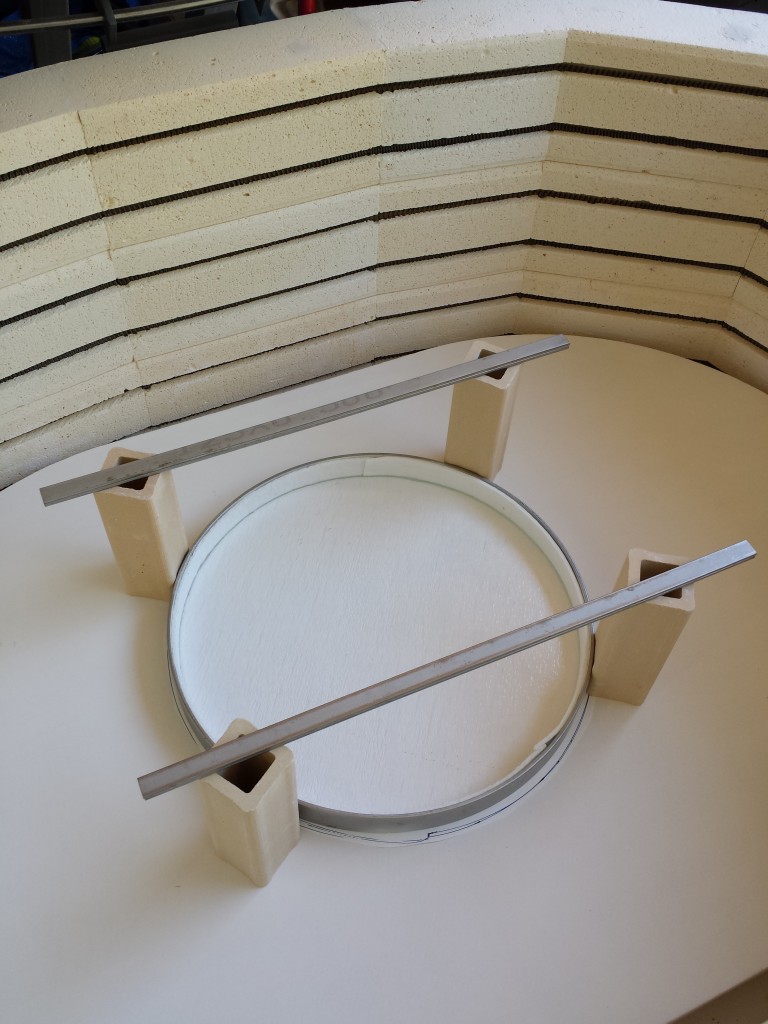
Next, place kiln posts around outside of the mold and place cut up kiln shelf strips across as shown with the stainless steel. In this first attempt, I used the ss strips, but, the heat combined with the weight bent them, so I won’t be using those anymore. But, they did work.
Next, place kiln posts around outside of the mold and place cut up kiln shelf strips across as shown with the stainless steel.
In this first attempt, I used the ss strips, but, the heat combined with the weight bent them, so I won’t be using those anymore. But, they did work.
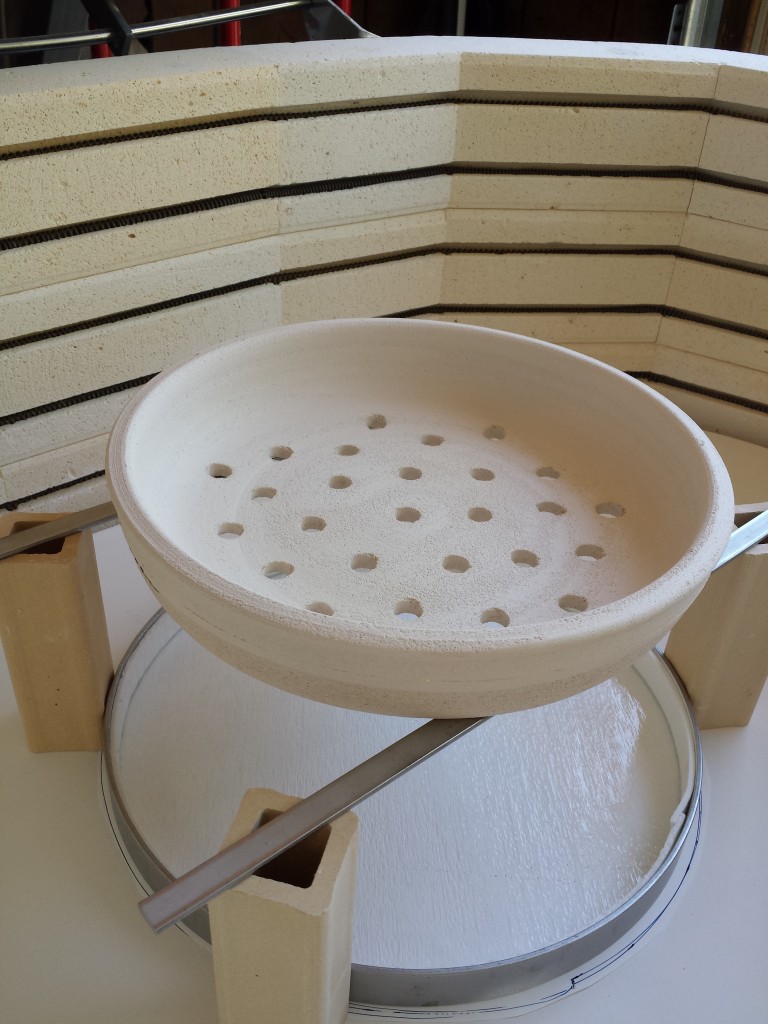
Dry run. Make sure that your set up fits properly. In this shot you can see that the clear is already in the mold. Use the end of a tool (screwdriver, paint brush, etc.) to poke through the holes to make sure your support is not under any of the holes at the edge.
Dry run. Make sure that your set-up fits properly. In this shot you can see that the clear is already in the mold.
Use the end of a tool (screwdriver, paint brush, etc.) to poke through the holes to make sure your support is not under any of the holes at the edge.
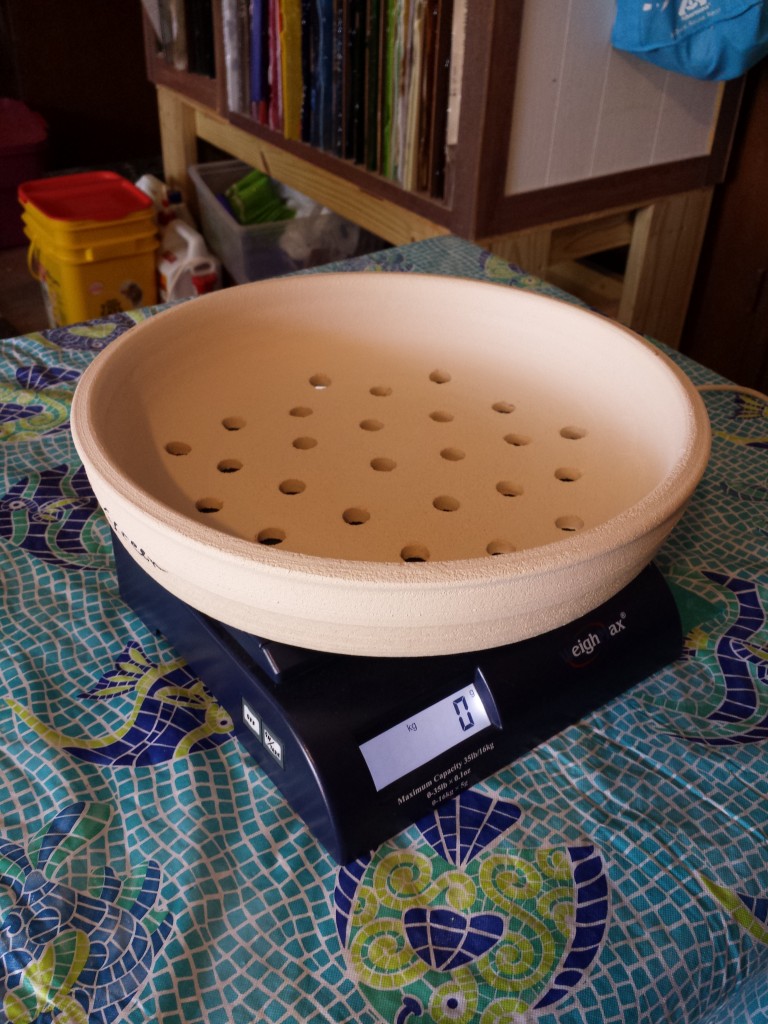
Put crucible on the scale and zero it so you can weigh the glass.
I wanted to add clear to equal the same weight of the clear base – in this case 580 grams. In the next run, I will skip this step, but if you are using mostly opalescent glass, you might want to add this.
I wanted to add clear to equal the same weight of the clear base – in this case 580 grams.
In the next run, I will skip this step, but if you are using mostly opalescent glass, you might want to add this.
Measure out your color. In this melt I used: 145g – 243 white 145g – 1116 turquoise 145g – 2164 Caribbean Blue, White streaky 145g – 118 periwinkle 70g  – 3328 White, Deep Royal Purple streaky 115g – 3116 Clear, Turquoise Blue, White streaky The total of color was 1345grams
Measure out your color.
In this melt I used:
145g – 243 white
145g – 1116 turquoise
145g – 2164 Caribbean Blue, White streaky
145g – 118 periwinkle
70g – 3328 White, Deep Royal Purple streaky
115g – 3116 Clear, Turquoise Blue, White streaky
The total of color was 1345grams
Check in both directions to ensure it’s centered. Remove measuring devices before you close the kiln.
Check in both directions to ensure it’s centered.
Remove measuring devices before you close the kiln.
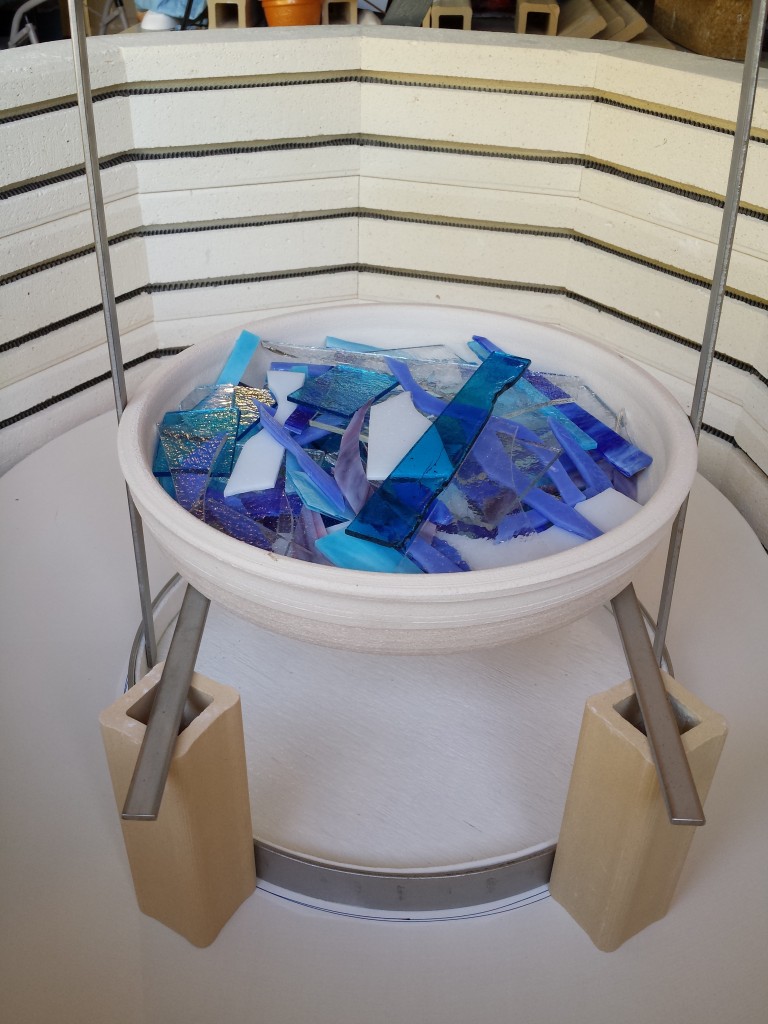
Check that your crucible is perfectly centered over your mold.  Here, I used stainless steel sticks to make sure both sides were equal.
Check that your crucible is perfectly centered over your mold.
Here, I used stainless steel sticks to make sure both sides were equal.
I used Laurie Spray’s firing schedule with my kiln and it worked quite well. The kiln used here is Olympic 2514GFE,  with RTC1000 controller. 250 degrees per hour to 1000  with no hold 450 dph to 1680 hold 90 minutes 9999 to 1520 hold 20 minutes 9999 to 900 hold 2 hours 100 to 800 hold 1 hour 50 to 700 hold 30 minutes off
I used Laurie Spray’s firing schedule with my kiln and it worked quite well.
The kiln used here is Olympic 2514GFE, with RTC1000 controller.
250 degrees per hour to 1000 with no hold
450 dph to 1680 hold 90 minutes
9999 to 1520 hold 20 minutes
9999 to 900 hold 2 hours
100 dph to 800 hold 1 hour
50 dph to 700 hold 30 minutes
off
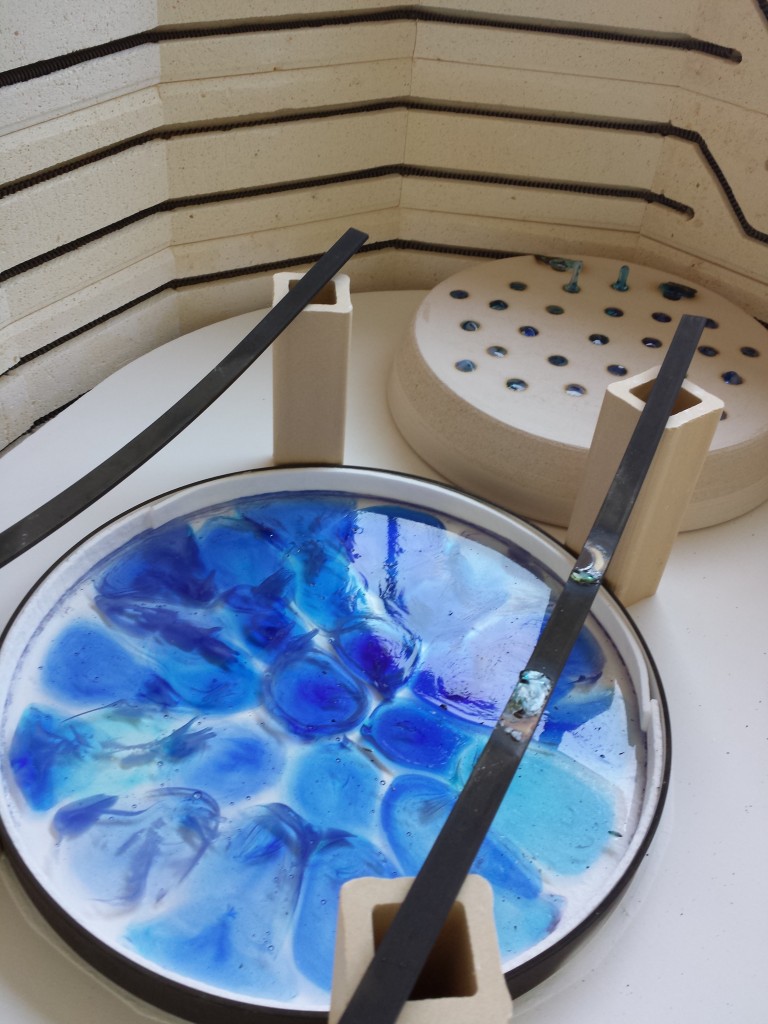
There isn’t much glass left. Notice the tan/gold glass on the top right? I didn’t use any of that color! It had to be a reaction between one of the pinks and one of the turquoise or blues, but it didn’t affect the final product, there is none of that color in the melt. But, use this as a cautionary tale; don’t use glasses that could have a reaction with each other.
There isn’t much glass left. Notice the tan/gold glass on the top right? I didn’t use any of that color! It had to be a reaction between one of the pinks and one of the turquoise or blues, but it didn’t affect the final product, there is none of that color in the melt.
But, use this as a cautionary tale; don’t use glasses that could have a reaction with each other.
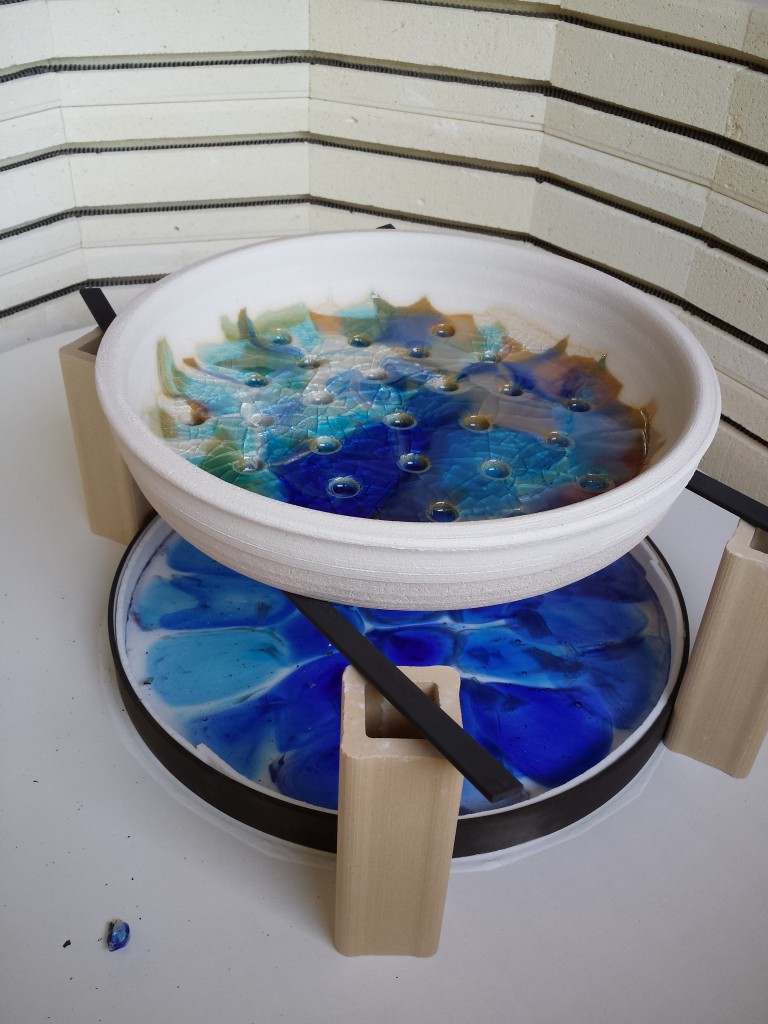
Here you see the results of the melt, still in the ring with the crucible removed. Notice that two holes were partially blocked and two had ½” drips. The drips were well rounded at the ends and a long way from detaching. The glass was well settled with no rough spots at all.
Here you see the results of the melt, still in the ring with the crucible removed. Notice that two holes were partially blocked and two had ½” drips. The drips were well rounded at the ends and a long way from detaching.
The glass was well settled with no rough spots at all.
Against white, it’s great. Holding it up to light shows too much clear was used. Next time, I will skip the 580g of clear and make it all color if any transparent glass is used.
Against white, it’s great.
Holding it up to light shows too much clear was used. Next time, I will skip the 580g of clear and make it all color if any transparent glass is used.
The final thickness is 5/16” or just a hair under 8mm.
Where did the white go? The only evidence of white is the whispy gray throughout.
Where did the white go? The only evidence of white is the wispy gray throughout.

Craft fair fun – trying to beat a frontal storm system (and failing)

We exhibited at UT Arlington yesterday. The fair was supposed to finish at 9pm. All afternoon we had been monitoring the progress of frontal rain and thunderstorms, moving South East slowly from the North and West. As the front moved South East, it was sucking in Gulf Air, a classical meteorological feature of the mid-West which in the Spring and Summer leads to unpleasant events like tornadoes. This time, we saw a steadily deepening line of red on the weather radar. I went for a drive to pick up some lighting bits and pieces at 7pm and saw lightning to the North and West, and an outflow cloud formation ahead of the storm moving slowly South over us. It was only a matter of time before the storm hit us, the main question being, would we make it to 9pm?
The decision was made for us at 7.45pm when the organizers declared an early close. We immediately began to tear down. Unlike many exhibitors, who have a modular rig with a smaller number of exhibits, our set up is more labor intensive, and we bring a lot more stock to an event. It takes us at least 1 hour to break down the whole rig. I wish we could go it quicker, we will look at that this Winter.
We set to work as fast as possible packing up. By 8.35 pm it was starting to rain, and we had a great light show above us. We left the E-Z Up fully configured and broke the displays down and put everything away. By this time, it was raining hard with gusty winds starting to pick up all around us. Normally, in a row of exhibitor tents, there is mutual wind protection, but once enough tents are broken down, that protection diminishes. More of that in a minute.
I set off to get the first car. When I arrived back at the exhibition area, Mary was trying to break down the tent, but then a gust of wind started to move it. We have 200 pounds of custom weights that we use to secure the corners of the tent, but once those are removed as the first part of the break-down, the tent is vulnerable to wind gusts. It took 4 people to hold it down and prevent it from going walkabout, while we loaded the car with the tables, exhibits, chairs and other paraphernalia. Then I moved the first car out of the way and set off to bring up the second car. By the time I got back to our pitch with the second car, it was bucketing down. We loaded remaining clutter into the second car, then, after I consulted the radar and determined that there was no let-up in the rain, we set (I think) a new record for collapsing an E-Z Up and loading it into a car trunk. It’s amazing how fast you can move when you are being rained on. By this time it was really raining hard (the red zone on the radar had hit us), so we set off out of the AT Arlington campus, driving carefully along suddenly-sodden roads. In Texas, a lot of people either fail to slow down or tiptoe along the road as if expecting imminent doom, we saw both behavioral pathologies on the way home.
We made it home, still wet. The cars are being unpacked on Sunday morning, with some stuff being put away for the Winter. Back to cyber-sales…

The Fall craft fair season is over…

Rainpebbles is now into the Winter selling and crafting season. Remember that Christmas is just around the corner, and Rainpebbles objects make great Christmas gifts for all ages and budgets..visit the Etsy store for ideas. Also, we create custom glass objects, if you see something that you like but want it in a different color, just contact us to start a dailogue.
We have some interesting new ideas in the works for 2014. Keep in touch.